• For more information on how to avoid pop-up ads and still support SkiTalk click HERE.

surfandski

Out on the slopes
Skier
Joined
Mar 5, 2017
Posts
708
Location
Clearwater Beach, Fl and Pisgah Forest, NC
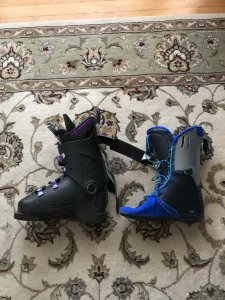
Due to a recent ankle fusion, I have a huge difference in the circumference between my ankles. When I bought Zipfits I went for the Grand Prix with the highest amount of OMfit material and that is perfect on my healthy ankle but way too much on my bad one. I tried to harvest OMfit by heating them up and working the material out the ports with my thumbs but couldn't get any out so I went to Lowe's and came up with a simple way to add and remove.

You want to go to the plumbing isle and buy clear plastic tubing that is 5/8" o.d. and 1/2" i.d.. Then buy a 1/2"wood dowel and finally buy some #4 tapered plugs for the end of the tubing (to seal OMfit tubes for storage).

It's really easy. Just slide the tubing into one of the 3 ports (tongue and each side) and the OMfit slides right into the tube. Once you get 2-3" of material in the tube, take the wooden dowel and push it in to move the material further down the tube. You may need to sand the dowel a bit first to make it slide in easier. Once half of the tube is full, turn it around and pack it in from the other side. You don't even need to heat the liners but at the very end it can help if you need to move around some material with your thumbs to get more out.

Obviously, most people won't need to remove as much as I did but to give you an idea, I removed over 36" of tubing worth of material. I'm sure I'll be adding a decent amount back and possibly adding a bit more to my good ankle but it was so easy to remove that I figured I'd error on the side of removing too much as adding it back is also very easy. Just insert the tube and press the dowel in to inject it and you can easily mark the tubing and dowel to know how much you are adding.

Given how easy this was, I'd recommend that everyone looking to buy Zipfits errors on the side of getting ones with too much OMfit vs needing to pay a ridiculous amount later on to buy an OMfit filler kit.

I'm writing this on my cell phone and adding pics is a pita so not sure how this will turn out.

IMG_20181028_192750537.jpg


IMG_20181028_192840170.jpg


IMG_20181028_194709685.jpg


IMG_20181028_193019146.jpg
IMG_20181028_192801045.jpg
IMG_20181028_194445825.jpg
 

ski otter 2

Making fresh tracks
Skier
Joined
Nov 20, 2015
Posts
2,929
Location
Front Range, Colorado
That's just what I figured I'd do if need be with the two Grand Prix (2nd hand and new) I acquired in the off season. In fact, from some old "around the house" project, can't remember what it was, I have a bunch of sections of that same tubing, just itching to get used. Thanks for giving it a successful test flight!!
 

Noodler

Sir Turn-a-lot
Skier
Joined
Oct 4, 2017
Posts
6,434
Location
Denver, CO
Nice job. I'm thinking I may harvest some OMFit from a old ZipFit to use in the 3rd chamber on my GARA's (I have fairly low insteps).
 

MountainMonster

~0~
Skier
Joined
Dec 11, 2016
Posts
2,128
Due to a recent ankle fusion, I have a huge difference in the circumference between my ankles. When I bought Zipfits I went for the Grand Prix with the highest amount of OMfit material and that is perfect on my healthy ankle but way too much on my bad one. I tried to harvest OMfit by heating them up and working the material out the ports with my thumbs but couldn't get any out so I went to Lowe's and came up with a simple way to add and remove.

You want to go to the plumbing isle and buy clear plastic tubing that is 5/8" o.d. and 1/2" i.d.. Then buy a 1/2"wood dowel and finally buy some #4 tapered plugs for the end of the tubing (to seal OMfit tubes for storage).

It's really easy. Just slide the tubing into one of the 3 ports (tongue and each side) and the OMfit slides right into the tube. Once you get 2-3" of material in the tube, take the wooden dowel and push it in to move the material further down the tube. You may need to sand the dowel a bit first to make it slide in easier. Once half of the tube is full, turn it around and pack it in from the other side. You don't even need to heat the liners but at the very end it can help if you need to move around some material with your thumbs to get more out.

Obviously, most people won't need to remove as much as I did but to give you an idea, I removed over 36" of tubing worth of material. I'm sure I'll be adding a decent amount back and possibly adding a bit more to my good ankle but it was so easy to remove that I figured I'd error on the side of removing too much as adding it back is also very easy. Just insert the tube and press the dowel in to inject it and you can easily mark the tubing and dowel to know how much you are adding.

Given how easy this was, I'd recommend that everyone looking to buy Zipfits errors on the side of getting ones with too much OMfit vs needing to pay a ridiculous amount later on to buy an OMfit filler kit.

I'm writing this on my cell phone and adding pics is a pita so not sure how this will turn out.

View attachment 56999

View attachment 57000

View attachment 57001

View attachment 57002 View attachment 57003 View attachment 57004

There must be something I'm missing. I can not get even a small amount of omni fit into the tube, from tongue or sides. You said you didn't heat your liners first ? Could you please explain a little further.

thanks, MM
 
Thread Starter
TS
surfandski

surfandski

Out on the slopes
Skier
Joined
Mar 5, 2017
Posts
708
Location
Clearwater Beach, Fl and Pisgah Forest, NC
There must be something I'm missing. I can not get even a small amount of omni fit into the tube, from tongue or sides. You said you didn't heat your liners first ? Could you please explain a little further.

thanks, MM

If the tube is sliding into the chamber that holds the OMfit then it should slide right in as it was effortless even at room temperature. Either your chambers are sealed off (some people say you need to cut/open them but mine were not sealed from the factory as I could put my pinky in and feel the material) or your Zipfits don't have any material where you are inserting the tube. Maybe your Zips got warm and the material slouched to the bottom. There really is no technique involved until you get to where there is almost zero OMfit left and at that point you need to move the material around with your fingers to get it into a clump and then stick the tube and the clump goes right into the tube.
 

bbinder

Making fresh tracks
Skier
SkiTalk Supporter
Joined
Nov 12, 2015
Posts
2,232
Location
Massachusetts
Is there Omfit in the area of the liner that closes around the lower calf, or is this just dense foam padding. Any idea on making an adjustment here? My daughter has a pair of Zipfits from an old boot - with her new (slightly smaller) shell, she cannot even engage the upper buckles to close them. No way. No how...
 

Noodler

Sir Turn-a-lot
Skier
Joined
Oct 4, 2017
Posts
6,434
Location
Denver, CO
Is there Omfit in the area of the liner that closes around the lower calf, or is this just dense foam padding. Any idea on making an adjustment here? My daughter has a pair of Zipfits from an old boot - with her new (slightly smaller) shell, she cannot even engage the upper buckles to close them. No way. No how...

There isn't any removable OMFit in that area. This will probably require liner surgery if you want her to be able to use the liner in the new shell.

Have you tried my fitting method that uses heating the ZipFit in an oven? I ask because that's the only method that heats the upper plastic rear spoiler built into the liner and enables it to mold to the shape of the shell upper cuff. Nothing else would get this accomplished. That may give her enough room to get the shell buckled.
 

bbinder

Making fresh tracks
Skier
SkiTalk Supporter
Joined
Nov 12, 2015
Posts
2,232
Location
Massachusetts
I did try your method of heating the liners in the oven, but it didn’t do the trick. Her previous shell was a little bigger, and even though the Zipfit ‘fits’ into the new shell, I wonder if it may still be too big for the new shell. I am reluctant to do any surgery on the liner for fear of ruining it. Based on what you are saying, I may be better off looking for an aftermarket liner that fits this shell better and either sell the Zipfits or save them for the future.
 

Noodler

Sir Turn-a-lot
Skier
Joined
Oct 4, 2017
Posts
6,434
Location
Denver, CO
I did try your method of heating the liners in the oven, but it didn’t do the trick. Her previous shell was a little bigger, and even though the Zipfit ‘fits’ into the new shell, I wonder if it may still be too big for the new shell. I am reluctant to do any surgery on the liner for fear of ruining it. Based on what you are saying, I may be better off looking for an aftermarket liner that fits this shell better and either sell the Zipfits or save them for the future.

What's the shell? Any option for moving the ladder over to be able to catch the buckle? If the ladder is screwed on, you could always drill some new holes further over. A shop might also be able to retrofit a longer buckle clip to catch the ladder. Which ZipFit model? There is a difference in cuff volume across the liners. Although I believe the claim is that the only difference is the amount of OMFit, there's a clear difference in cuff volume between my GARA and World Cup SE liners (they're bigger).
 

bbinder

Making fresh tracks
Skier
SkiTalk Supporter
Joined
Nov 12, 2015
Posts
2,232
Location
Massachusetts
E1A61415-CEB9-410F-A2E3-13272563916B.jpeg
D49DDCC9-A23E-4221-B54E-9E6A09E4088C.jpeg
What's the shell? Any option for moving the ladder over to be able to catch the buckle? If the ladder is screwed on, you could always drill some new holes further over. A shop might also be able to retrofit a longer buckle clip to catch the ladder. Which ZipFit model? There is a difference in cuff volume across the liners. Although I believe the claim is that the only difference is the amount of OMFit, there's a clear difference in cuff volume between my GARA and World Cup SE liners (they're bigger).

The new shell is a Soloman x max 120 and the shellis marked as a 23/23.5 size. She purchased the liner from Steve Bagley at Snowbird whe she ski bummed for a winter at Alta and it was placed in a Krypton Storm shell that was (I believe) size 24. I don’t know which model liner, but I have attached a picture below. The liner is stamped 24.5, which is what makes me think that it may simply be too large for the new shell. We travelled 3.5 hours to Stowe to buy the new boots and have driven back once to tweak the boots - each time we drove up, we went skiing after a tweak on the boots, so we have a total of 4 visits to the shop. And this is definitely not a knock on the shop - they are great! We are just trying to avoid more long drives to continue tweaking. Marcia and I were probably spoiled with our most recent boots - we were good to go after one revisit and tweak for each of us (thanks Philpug and Bud Heishman respectively!).

When she first tried the boots, they felt comfortably snug, but her feet went totally numb before she even got on the first lift ride. Heating the shell helped this issue, but now she feels that there is too much room dorsal to her ankle (between buckles 2 and 3) so that she feels like she can almost twist her ankle when tipping the ski...

Above are pictures of the Zipfit liner and the shell side by side and assembled.
When she puts her foot in the assembled boot, the shell actually looks like is deformed. I don’t think that moving the buckles or bales will help much...
Weird.
 

Attachments

  • 8A9AD2AE-9092-480D-B4A1-1ADC6A03413B.jpeg
    8A9AD2AE-9092-480D-B4A1-1ADC6A03413B.jpeg
    195.7 KB · Views: 30

Noodler

Sir Turn-a-lot
Skier
Joined
Oct 4, 2017
Posts
6,434
Location
Denver, CO
That's the ZipFit Diva liner. It's a liner specifically built for women. It has a modified plastic rear cuff to be softer and "spread" for a lower/larger calf muscle.

Where is the ZipFit taking up the most volume in the upper cuff? Is there more thickness in the upper tongue or in the rear cuff? If it's the tongue, that shouldn't be too difficult to modify. The upper cuff would most likely require major surgery and at that point not be worth it.
 

bbinder

Making fresh tracks
Skier
SkiTalk Supporter
Joined
Nov 12, 2015
Posts
2,232
Location
Massachusetts
That's the ZipFit Diva liner. It's a liner specifically built for women. It has a modified plastic rear cuff to be softer and "spread" for a lower/larger calf muscle.

Where is the ZipFit taking up the most volume in the upper cuff? Is there more thickness in the upper tongue or in the rear cuff? If it's the tongue, that shouldn't be too difficult to modify. The upper cuff would most likely require major surgery and at that point not be worth it.

We did this last spring, so honestly I don’t remember for sure. I will need to get her back into the boot so I can give you better info on this. I do remember thinking that a slightly thinner Zipfit may work better, but I am definitely not an expert with these things.
 

Noodler

Sir Turn-a-lot
Skier
Joined
Oct 4, 2017
Posts
6,434
Location
Denver, CO
Today I took the original tubes (now empty) from my SpotFit injection kit and used them to harvest OMFit compound from one of my damaged ZipFit liners. Using the tubes is so, so much easier than trying to massage this stuff out of the liner. I was able to harvest 2 full tubes from a single tongue. So I learned that the bladder in the tongue is much larger than I originally thought. It goes fully from top to bottom and almost the full width side-to-side.

ZipFit has changed the design of the bladder tube entry points (the "sleeves") over the years. For some time they only used the "raw" plastic for the bladders without any fabric backing. This left the sleeves vulnerable to damage trying to peel them apart and get into the bladders. Later they added a fabric backing, but you still need to be careful to peel apart the plastic to form a tube; don't just peel the plastic away from the fabric backing and think you have it right. Also note that the way the tongues are done has also changed. There was a period where there is only a plastic liner on one side (toward the front of the tongue) and you just slip the tube between the plastic sleeve and the leather collar on the tongue. The newest liners now have the same fabric backed sleeves as the ankle pockets, so you must peel those apart to correctly get to the inside of the tongue bladder.

BTW - You do not need to keep the OMFit compound air tight for storage. It does not dry out. ZipFit ships the compound in open-ended tubes. No need to seal the ends of the tubes.
 

Noodler

Sir Turn-a-lot
Skier
Joined
Oct 4, 2017
Posts
6,434
Location
Denver, CO
bbinder - now that I know how much OMFit is in the tongue, there is no doubt in my mind that you could significantly reduce the volume of the tongue and possibly use those shells no problem. Just follow the instructions above if you want to DIY.
 

bbinder

Making fresh tracks
Skier
SkiTalk Supporter
Joined
Nov 12, 2015
Posts
2,232
Location
Massachusetts
bbinder - now that I know how much OMFit is in the tongue, there is no doubt in my mind that you could significantly reduce the volume of the tongue and possibly use those shells no problem. Just follow the instructions above if you want to DIY.

Where is the access point for the tongue? I don’t see any open sleeve like spots on my daughters liners - it is either my faulty observation skills or they are stitched over.

We were playing with her boots yesterday and I noted that the second buckle from the toe has 3 mounting points built into it. I had not noticed that before. For fun, I moved this buckle to the rear mounting point (approximately 1 cm), and she felt a positive difference in how the boot felt.
 

Noodler

Sir Turn-a-lot
Skier
Joined
Oct 4, 2017
Posts
6,434
Location
Denver, CO
Where is the access point for the tongue? I don’t see any open sleeve like spots on my daughters liners - it is either my faulty observation skills or they are stitched over.

We were playing with her boots yesterday and I noted that the second buckle from the toe has 3 mounting points built into it. I had not noticed that before. For fun, I moved this buckle to the rear mounting point (approximately 1 cm), and she felt a positive difference in how the boot felt.

See the image below and where the finger is pointing. You should notice an area in the middle where the stitching is not present. There is a "sleeve" for the bladder that is usually hidden down in this area where the plastic tongue is separated from the leather collar. You may need to use a needle nose pliers to pull the sleeve up and out of this area.

gp2009-tongueinjectionsite.jpg
 

Noodler

Sir Turn-a-lot
Skier
Joined
Oct 4, 2017
Posts
6,434
Location
Denver, CO
Today I took the original tubes (now empty) from my SpotFit injection kit and used them to harvest OMFit compound from one of my damaged ZipFit liners. Using the tubes is so, so much easier than trying to massage this stuff out of the liner. I was able to harvest 2 full tubes from a single tongue. So I learned that the bladder in the tongue is much larger than I originally thought. It goes fully from top to bottom and almost the full width side-to-side.

ZipFit has changed the design of the bladder tube entry points (the "sleeves") over the years. For some time they only used the "raw" plastic for the bladders without any fabric backing. This left the sleeves vulnerable to damage trying to peel them apart and get into the bladders. Later they added a fabric backing, but you still need to be careful to peel apart the plastic to form a tube; don't just peel the plastic away from the fabric backing and think you have it right. Also note that the way the tongues are done has also changed. There was a period where there is only a plastic liner on one side (toward the front of the tongue) and you just slip the tube between the plastic sleeve and the leather collar on the tongue. The newest liners now have the same fabric backed sleeves as the ankle pockets, so you must peel those apart to correctly get to the inside of the tongue bladder.

BTW - You do not need to keep the OMFit compound air tight for storage. It does not dry out. ZipFit ships the compound in open-ended tubes. No need to seal the ends of the tubes.

I found an image of the tongue bladder on the ZipFit Korea site.

%EB%B9%84%EB%8C%80%EC%B9%AD.jpg
 

bbinder

Making fresh tracks
Skier
SkiTalk Supporter
Joined
Nov 12, 2015
Posts
2,232
Location
Massachusetts
Thanks! I will check that out and keep you posted!
 

Jersey Skier

aka RatherPlayThanWork or Gary
Skier
Joined
Jan 16, 2016
Posts
1,984
Location
Metuchen, NJ
So I had my first day of the season today. The only thing on my body that hurt was where the two red marks on the tongue are. Thinking that adding more Omfit down the center if the tongue in the blue area might help spread the pressure.

zip2.jpg
 

Sponsor

Staff online

Top